How to Photograph Art
by Joelle Steele
You spend hours painting or sculpting or assembling your masterpiece. You know the galleries want great images and you need to archive your work. You have to hire someone to photograph your art or you have to invest some time doing it yourself. But when you do it yourself, you’re never pleased with the end result. The photo is always too blue, too red, has a glare, a reflection, flashback, not enough texture, has a dark shadow behind it, is distorted — the list goes on and on. It simply doesn’t look like your creation. You may drop a digital file into Photoshop and fiddle with it for an hour or two, trying to make it look right. You might even come close, but it’s still off. What is the trick to all of this? How do you correctly photograph your art?
Camera Selection
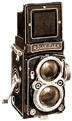
To photograph art, you can shoot with either a good quality film or digital camera, or if you have one of the high-end cell phones you may be able to use that as well. After using excellent Rollei 35mm, 4×4, and 2×2 cameras for more than 30 years, I personally like my digital cameras a lot better than the ones on my cell phone and tablet, especially for shooting artwork. These cameras provide many great features such as “white balance” and other aesthetic settings options, flash override, etc., and I can go straight from the camera to the computer with my images. But, whatever camera you choose, you won’t get the optimum results at all unless you set up the shot correctly before you even look through the lens.
Set-ups
How you set up a photograph is always the key to getting the best results. There are a few things that will have the most impact on your finished product.
Glass and Varnish. It is always best to get in the habit of photographing your art before you frame it, because otherwise you will just end up having to remove the matting, glass, and frame when you finally do get around to shooting it. Glass can create reflections and can flatten your art, making it harder to see any texture inherent in the work. A high sheen varnish over your canvas can result in unwanted reflections and glare as well.
Matting. If it’is white or very light in color, can fool the light meter, resulting in the wrong camera setting. But you might not be able to remove the framing, in which case there are directions for how to photograph works under glass in the “Framed Works” section of “Lighting” below.’
Background. For most paintings, use a non-reflective (matte) black or dark gray background that exceeds the size of the painting by about 50 percent (in other words it is about half again as big as the painting itself). Use a non-reflective neutral gray background for sculptures or for reflective/shiny works (metals, glasses, etc.). Whether you are indoors or out, do not shoot near a colored wall or any surface which could reflect its color onto your artwork.
Placement. To make the process as easy as possible, mount your painting on an easel, or place your sculpture on a table or pedestal to photograph it. Turn the art and look at it from all directions (north, south, east, west, etc.) to determine the direction in which to best position your camera.
Lighting. The quality of the ambient and supplemental light you use, along with the positioning of the artwork within that light, will determine how accurately the color and texture of your artwork are captured in the photograph.
Flash. Whether using a manual or digital camera, avoid using flash if at all possible, whether you are shooting indoors or out. It rarely gives the results you want, and often creates hot spots (bright areas on the photo) that are virtually impossible to eliminate, even if you’re very talented in the use of Photoshop or some other photo editing software.
Outdoors. Shooting outside on a bright but overcast day when the sun is directly overhead (around mid-day) produces the very best lighting you can get, as it will reflect the true color of the painting or sculpture. But, this is rarely practical, especially during times of the year when you have a lot of cloudy days, rain, snow, wind, or some other deterrent to shooting. Also, depending on how you finished your art, the sun may just bounce right off it like a mirror. But, if you do photograph outdoors, and if you use a film camera, do not use additional/supplemental lighting when shooting Daylight film (which is formulated for outdoor use).
Indoors. In the end, you will probably be photographing at least some of your art indoors. There, you must have the best lighting possible, and a skylight may be very helpful. Beyond that, good lighting is usually achieved by a combination of a white ambient light, and at least one directional/supplemental lamp that you can manipulate to get your art’s true color and texture. If you are using a film camera with Tungsten film (formulated for indoor use), do not let any daylight (outside light) into the room.
Texture. Shadows in a painting or sculpture can be very desirable at times, especially on works that are highly textured or have intricate shapes and details that only become apparent under the right lighting. To ensure that your photo looks the way the artwork does in this regard, illuminate your art with sunlight or an overhead light indoors, and position either the art or the light until the details of your art are clearly apparent. When shooting indoors, you may need to use both ambient indoor light and a directional/supplemental light above the artwork (not below or from the side) to make this happen.
Glass/Fabric. If you are photographing art glass or translucent fabric art, shoot with the light coming from behind and through the piece, but without revealing the source or direction of the light itself (it will look like a hot spot if you do).
Framed Works. If you absolutely cannot unframe your art, or if your frame is part of the art itself, you will have to deal with the problems inherent in lighting works under glass and positioning the camera to avoid glare or unwanted reflections. Start by positioning the camera so that when you look through the lens you don’t see a reflection of yourself or anything else in the glass. To do this, you will probably have to shoot from a slight angle (above or to the side) but without causing too much distortion to the shape of the art. You will need to move the art around until you find the best place to achieve this. Next, position any directional/supplemental lighting so that when you look through the camera lens there is no glare on the glass. Again, you will need to move the light around until you get it to the right position. The good news is that you will only have to do this once, and then you’ll know where to put the framed art, the camera, and the light when you photograph any future works under glass. Makes notes and a drawing to help you avoid going through this trial-and-error process again.
Camera Tips
Tripods. Always set your camera on a tripod, because even the steadiest of hands are rarely sufficient for optimum results, and you might need to use slower shutter speeds. Both make a tripod a necessity, as even the slightest movement can blur an image. For the same reason, always use a remote control or remote cable shutter release to avoid any vibration of the camera when you push the shutter button.
Lenses. Use a “normal” lens (40-58mm) when photographing art. Don’t use a portrait lens or a wide angle lends or any other specialty lens. If you only have a zoom lens, learn how to set it in the mid-range where any distortion will be minimized.
Aim/Position. Aim the camera at the center of your art or raise the tripod just a little above any three-dimensional or heavily textured works. Look carefully through the lens to make sure the camera is positioned so that your painting is squared at all corners, or that any distortion is minimal.
Focus. If your camera has autofocus, go with that. If not, very carefully focus the lens to be sure the image you are seeing is perfectly clear.
Bracketing. Take at least three to five shots of each piece of art at different settings. This is called “bracketing.” Start with whatever your camera’s light meter recommends or whatever its automatic settings are.
Settings. When using a digital camera, set it at the highest quality setting or the biggest file setting that your camera is capable of producing. You can experiment with a variety of picture settings until you find one or two on your particular camera that give the desired results. When using a film camera, you should shoot a few frames at different F-stops, starting with F/8 or F/11, the normal F-stop setting for most point-and-shoot cameras. Then take some shots at higher F-stops (F/16, F/22, F/32, etc.) and some at lower F-stops (F/5.6, F/4, F/2.8, etc). You can also take some shots at slower shutter speeds from 1/60 to 1/25. If you are shooting a painting that is predominantly dark, you will need to set lower F-stops for greater exposure, and if your work is lighter, you will need to set the F-stops higher.
LCD Display. Don’t rely on the LCD display on a digital camera to examine details, as the image is just way too small on even the biggest displays. If your digital camera’s LCD has an enlargement feature this might help a little, but even so, it may not show the true color.
Photo Editing
Before you do any photo editing on your computer, you need to be sure that your monitor is calibrated to provide you with the most accurate color and contrast. Do an Internet search for “how to calibrate your monitor,” and you will get a lot of links to directions for doing this.
You should look at your photographic images in a good photo editing software program such as Adobe Photoshop (or Adobe Photoshop Elements, Photo Deluxe, etc.). You can then make any slight adjustments to the photo in order to ensure that it matches the original work. Make your adjustments with the painting or sculpture nearby so that you can compare as you adjust. The most common photo editing tasks you will need to master are adjusting:
Brightness. Do not confuse this with lightness, which is a different matter entirely. Making the image brighter brings up the whites, but making the image darker makes the whites gray.
Contrast. Removing contrast makes an image look dull, but adding contrast can make it look too crisp when that is not the artistic intention of the original work.
Color Balance. This allows you to add and delete color if you were unable to achieve the true color of the original art when you photographed it. This will not work as well if the color in the photograph is too far removed from the true color of your artwork.
Saturation. Some scanners, and especially most digital cameras, tend to put a lot more color into their images than would be normally found in nature or in a work of art. By reducing the saturation (not desaturating) you can usually achieve a closer proximity to the true color of the original work.
Distortion. If an image is skewed or torqued so that the corners of a painting are not exactly square (e.g., one side is shorter and the opposite is longer), you will need to fix it. However, because this can alter the content of your art according to how distorted the photo is, it is better to make sure there is as little of this distortion as possible when you take the photograph.
Archiving Your Photos
The very best way to archive your photos or slides is in digital files, whether they are from scans of prints, negatives, or slides, or are files right out of your digital camera. Nothing beats a digital file in terms of archival quality. It is far superior to any other photographic format ever known, because the color and contrast cannot deteriorate in a digital file the way it can in prints, negs, and slides. A digital file will probably even outlast many original works of art in terms of aesthetic integrity, since a digital file can never suffer from exposure to sunlight, moisture, fluorescent lights, or any other potential art hazard. And a digital file is so flexible in its applications. You’ve just gotta love it for that alone! After all, you can easily use a digital file on the Web, or you can take it almost anywhere and have it printed out on high-quality photographic paper, or you can have it made into slides.
File Type. Save and store your photographic images as TIF (TIFF) files, not JPGs (JPEGs). The JPG file structure is unstable for long term use as it slowly degenerates each time the file is opened, so that over a period of time you will lose a certain amount of color and clarity. If you ever need to send someone a photo of your art over the Internet, just open the TIF file in your photo editing software, do a “save as,” and make a JPG copy of your TIF file to send.
Digital Camera Files. With image files from your digital camera, you will need to save your images at the original size, but convert them from JPG to TIF format. Open a JPG in your photo editing software, do a “save as,” and make a TIF copy of the JPG file.
File Extensions. You can not convert a TIF to a JPG or a JPG to a TIF by merely changing the extension on the file name. All that will do is make a file that cannot be opened until the extension is changed back to what it was originally.
Scanning. When scanning photographic prints made from negatives, or scanning a small original art piece, scan at a resolution of no less than 300 dpi (300 dots per inch) minimum, 600 dpi if the original art is small or has a lot of detail in it. If the art is a black-and-white line drawing, scan it at a minimum of 600 dpi, preferably 1200 dpi. When scanning negatives and slides of your artwork, scan them at a minimum of 800 dpi to 1200 dpi.
File and Image Size. Your digital files will take up more room when they have a higher dpi, but at that size, you will be able to enlarge them if necessary for reproduction onto a poster or some other printed item, and you will also be able to view the details of the art when it is enlarged on your computer screen. It is better to err in making an image too big than to make it too small, because you can make a big image smaller but you can’t make a small image larger. This is very important if you sell a work and cannot get it back to re-photograph it. You’ll be stuck with whatever size you made the digital image.
Storage. Keep your image files backed up onto your external hard drive or a flash drive. You can also burn them to CDs. Store them in a fireproof safe or safe deposit box. Organize them so that you can find your art when you need it. A typed copy of the contents stored with each flash drive or CD, should contain plenty of details about each piece of artwork.
This article last updated: 10/03/2013.


